If there is one journey in the Indian Himalayas that rewards photographers at every single turn, it is the road to Adi Kailash and Om Parvat. Tucked deep inside the Pithoragarh district of Uttarakhand, this high-altitude pilgrimage circuit sits close to the Indo-Tibet border and delivers some of the most dramatic, untouched mountain landscapes you will ever point a lens at. From sheer snow walls rising above narrow valleys to a sacred peak that carries the natural imprint of Om in its snowfields, every frame here feels like a privilege.
What makes this destination stand apart from the heavily photographed Himalayan circuits is its relative obscurity. Kedarnath draws millions. Badrinath has infrastructure to match. But Adi Kailash still belongs to the quiet ones — the trekkers, the seekers, and now, the photographers chasing images that have not yet flooded social media. The combination of extreme altitude, border-zone light, raw terrain, and deeply spiritual atmosphere creates a visual language unlike anywhere else in India.
This dedicated Adi Kailash Photography Guide covers everything you need to arrive prepared and shoot with intention. Whether you carry a mirrorless camera, a smartphone, or both, the locations, timing, gear strategies, and practical rules laid out here will help you bring home images that do justice to one of the most extraordinary places on the planet.
Why Adi Kailash Om Parvat Photography Is Unlike Anything Else
The Adi Kailash Om Parvat photography best spots are not just scenic viewpoints — they are places where geography, spirituality, and light converge in genuinely rare ways. The altitude ranges from around 2,000 metres at Dharchula to over 5,600 metres near the Nabhidhang viewpoint for Om Parvat. This dramatic elevation gain means you pass through multiple climate zones, each with its own visual character: dense forests with mist curling through rhododendrons, barren river valleys with turquoise glacial water, and high alpine meadows that explode with wildflowers in June and July.
The border-zone geography also means artificial light pollution is virtually zero. The Milky Way arch you can photograph from Jolingkong base at 3,700 metres on a clear night is the kind of shot that takes years of planning in other parts of the world and practically falls into your lap here.
For photographers who are also interested in the devotional dimension of this route, understanding the sacred context deepens the visual storytelling. This trek is deeply significant for devotees, and you can read more about the spiritual dimension in our guide to Adi Kailash Yatra for Shaivites to understand who you share the trail with and why their presence adds emotional depth to your photography.
Top Photo Spots on the Adi Kailash Circuit
Jolingkong at Dawn
Jolingkong is the base camp immediately below the Adi Kailash peak, and it is arguably the single most powerful photographic location on the entire circuit. The peak itself — a near-perfect triangular summit — catches the first light of sunrise in a way that shifts from deep burgundy to molten gold within about twenty minutes. Set your alarm for 4:30 AM, position yourself on the flat glacial moraine to the southeast of the base camp, and shoot in RAW format so you have full latitude to recover the highlights from the snow and the shadows in the valley simultaneously.
The reflection pool near the Parvati Lake at Jolingkong adds a second compositional layer when the wind is low, usually in the early morning before 7 AM. A wide-angle lens in the 16-24mm range on full frame, or the equivalent on a crop sensor, will let you include both the peak and the foreground in one frame without distortion.
Om Parvat from Nabhidhang
The viewpoint at Nabhidhang, sitting at approximately 5,600 metres, is where most visitors get their clearest view of Om Parvat — the sacred peak where snow accumulates in the natural shape of the Sanskrit symbol Om. For photography, the challenge here is that the Om formation is visible only in certain snow conditions, typically best between late September and early November when the monsoon has deposited fresh snow and the pre-winter clarity sets in.
A telephoto lens of at least 200mm is essential for isolating the Om formation cleanly. Shoot in the mid-morning window between 9 AM and 11 AM when the sun angle illuminates the snow pattern from the front. Later in the afternoon, the shadows from adjacent ridges encroach on the formation and reduce the contrast that makes it legible in photographs.
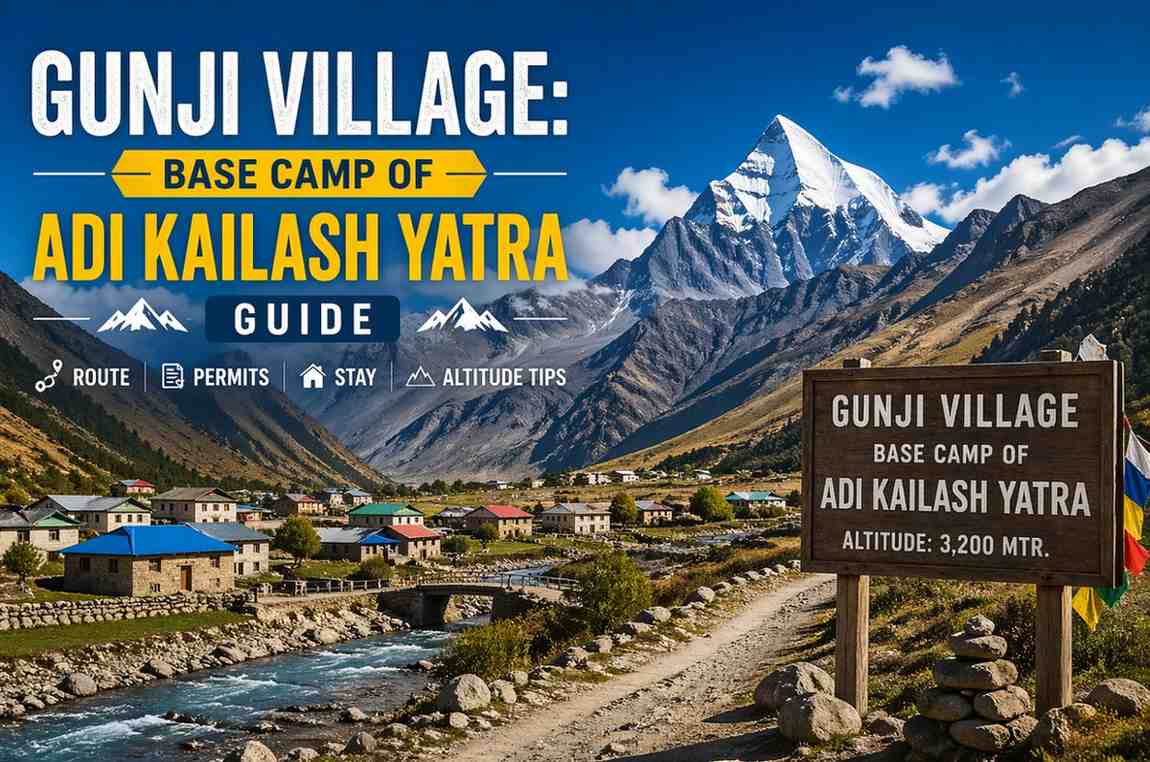
Snow Walls Near Gunji
The road and trail between Gunji and Nabhidhang passes through sections where winter snowfall compacts into vertical walls that can stand four to six metres tall even into late May and early June. These blue-white corridors of compressed snow create surreal, abstract compositions — especially powerful in wide-angle shots with a person in the frame for scale.
The colour temperature of light inside these snow walls is noticeably colder and bluer than the ambient light outside them, which can work beautifully in black and white conversions or when you want to lean into a minimalist, graphic aesthetic. Shoot during overcast conditions here if possible; direct sunlight creates harsh shadows that break up the clean lines.
The Kali River at Tawaghat
The journey to Adi Kailash begins from Dharchula, and before you gain significant altitude, the trail passes through Tawaghat where the Kali River — which forms the border between India and Nepal — runs in deep, fast-moving curves. The best photography here is actually at dusk and in the blue hour following sunset. The turquoise water against the dark schist rock walls of the gorge, with the last light reflecting off the water’s surface, produces one of the most underrated landscape images on this entire route.
A polarising filter is useful here to cut the glare off the water surface and allow the depth of colour to show through. A tripod and long exposures of 1-3 seconds will smooth the rapids into silky motion blur while keeping the rock walls sharp.
Managing your body well on this route is as important as managing your camera. The rapid altitude gain between Gunji and Nabhidhang is one of the steepest on any Indian Himalayan trek, and understanding the symptoms and prevention protocols covered in our article on Altitude Sickness at Adi Kailash is not optional reading for anyone planning this trip.
Chiyalekh Meadows
The Chiyalekh plateau sits at around 3,600 metres and opens into broad, high-altitude grasslands with a 360-degree mountain panorama. Between late May and July, the meadows are blanketed with Himalayan wildflowers — Brahma Kamal, Aconite, and Primula among them. This is where macro photography and landscape photography co-exist, and where golden hour light paints the entire plateau in warm amber tones that contrast with the cool blue of the distant snow peaks.
Drone photographers’ note: Chiyalekh is one of the few spots on this circuit where drone flying regulations may be slightly more permissive than at the border-adjacent zones, but advance permissions are still required. More on this below.
Best Season for Adi Kailash Photography
The route is officially open between May and October, but not all months offer the same photographic value.
May to mid-June is excellent for snow walls, spring wildflowers, and relatively clear skies before the monsoon arrives. Light is crisp in the morning and soft in the late afternoon. Crowds are minimal.
Late June through August is the monsoon period. Rain and cloud cover can obscure the peaks for days at a stretch, but this period also offers the most dramatic cloud formations and mist photography. The valleys are intensely green, and waterfall subjects multiply across the trail. If you are comfortable with uncertainty and shoot well in overcast light, this is actually a rich season.
September and October bring post-monsoon clarity. The air is washed clean, the snow line is refreshed, and Om Parvat’s formation is at its most photogenic. Morning temperatures drop sharply but the light is extraordinary. This is the window most landscape photographers specifically target.
Understanding how the Weather and Temperature patterns shift through these months will help you pack the right gear and set realistic expectations for shooting windows each day. Temperature at Nabhidhang can drop below -10°C on October nights, which affects both your body and your equipment.
Camera Gear Tips for High-Altitude Cold
Batteries
Cold kills battery life faster than anything else on a Himalayan shoot. Carry at least three batteries per camera body and sleep with them inside your sleeping bag every night. A battery that reads 40% charge in your tent at 5,500 metres may read empty the moment you step outside into -5°C air.
Lenses
A versatile mid-range zoom in the 24-70mm or 18-55mm range handles most situations. Add a 70-200mm for Om Parvat’s snow formation and a wide prime — a 24mm f/1.8 is ideal — for night sky and Milky Way sessions at Jolingkong.
Filters
A circular polariser for the Kali River and glacial lakes. A 6-stop ND filter for long-exposure waterfall work during the monsoon months. A UV filter on every lens as a protective layer against the higher UV index at altitude.
Moisture Control
Humidity from glacial melt can cause condensation inside lens elements when you move rapidly between temperature zones. Use silica gel packets inside your camera bag and allow your equipment to acclimatize slowly before shooting.
Sensor Calibration
At extreme altitudes above 4,500 metres, some electronic sensors in auto-exposure systems can behave inconsistently. Shooting in manual mode and learning to read a histogram is strongly recommended for critical shots.
Drone Regulations in the Border Area
Adi Kailash sits within a restricted zone close to the Indo-Tibet border, and drone regulations here are among the strictest in India. As of 2026, flying any drone within the Inner Line Permit area without prior written clearance from the District Magistrate of Pithoragarh and the relevant security agencies is illegal and can result in equipment confiscation.
The key rules to understand:
You must apply for a drone flight clearance at least 30 days before your trip. Permissions are granted on a case-by-case basis and are not guaranteed. The No Permission No Takeoff (NPNT) requirement means your drone must be registered and compliant with DGCA regulations before you even apply. Flying near military installations or within five kilometres of the international border is strictly prohibited, regardless of permissions obtained.
If drone footage from this region is central to your project, engage a local production coordinator who has a track record of navigating these approvals. Attempting to fly without clearance is not worth the risk, either legally or ethically.
Smartphone vs DSLR: What Works Best Here
The honest answer is that both have a place on this route, but for very different purposes.
Modern flagship smartphones — particularly those with computational photography and sensor-shift stabilization — perform remarkably well in the 8 AM to 4 PM window when light is strong. For social media formats, Reels, and quick portrait documentation, a smartphone’s portability at high altitude is a genuine advantage. Weight matters at 5,600 metres.
However, for the pre-dawn shots at Jolingkong, the Om Parvat telephoto frames, and the Milky Way sessions, there is still no substitute for a dedicated camera with a fast lens and a manual mode. The low-light performance gap between a smartphone and a mirrorless camera with a fast prime remains significant, and the shots that will define this journey — the ones that look different from everything already on Instagram — will come from deliberate, manual, tripod-mounted long exposures that smartphones cannot yet replicate convincingly.
The practical recommendation is to carry both. Use the smartphone for documentation and behind-the-scenes content, and the dedicated camera for the shots you actually came here to make.
This kind of multi-system, high-altitude photography expedition shares many of the physical and logistical demands found in multi-day mountain treks, and if this route sparks an appetite for more challenging terrain, our comprehensive roundup of the top 10 treks in Uttarakhand will give you your next shortlist.
Practical Tips Before You Go
Acclimatize properly: Do not rush to Nabhidhang. Spend an extra night at Gunji or Budhi to let your body adjust.
Inner Line Permit: Non-Indians require an Inner Line Permit from the District Magistrate’s office or through an authorized travel operator before entering this region.
Shoot in RAW always: The dynamic range requirements in this environment — bright snow, deep valley shadows — demand the full flexibility of RAW files.
Golden hour is longer at altitude: Because you are above the haze layer, the quality of golden hour light lasts 20-30 minutes longer than at sea level. Use it fully.
Respect the space: Many fellow travellers on this route are pilgrims. Ask before photographing individuals and be mindful of rituals in progress.
FAQ: Adi Kailash Photography
Q1: What is the best month to photograph Om Parvat’s Om formation clearly?
A: Late September to mid-October is the most reliable window. Post-monsoon snowfall refreshes the formation, and pre-winter skies offer exceptional clarity.
Q2: Do I need any special permit to carry a professional camera or a tripod?
A: There is no specific camera permit, but you do need an Inner Line Permit to access the region. There are no restrictions on tripods for ground-based photography.
Q3: Can I photograph the Kali River from the Nepal side?
A: The Kali River forms the India-Nepal international border at Tawaghat. Photography from the Indian bank is permitted. Crossing to the Nepal bank requires a separate immigration process and is beyond the scope of a standard Adi Kailash visit.
Q4: Is there mobile connectivity for backing up files during the trek?
A: BSNL has limited coverage at Gunji and Budhi. There is no reliable data connectivity above Gunji. Carry sufficient storage cards and a portable hard drive or SSD for daily backups.
Q5: How do I protect my camera from dust on the trail?
A: The lower sections of the trail between Dharchula and Gunji can be dusty, especially in dry months. Use a rain cover or a dry bag for transport and a microfibre cloth for wiping down lenses at rest stops.
Summary
Adi Kailash and Om Parvat represent one of the most compelling, underexplored photography destinations in the entire Himalayan arc. The combination of sacred mountain drama, pristine high-altitude light, cultural depth, and near-zero commercial tourism means that images from this circuit still carry genuine rarity value. The spots outlined in this Adi Kailash Photography Guide — from the pre-dawn alpenglow at Jolingkong to the snow-formation detail at Nabhidhang, the abstract snow walls near Gunji, the blue-hour river gorge at Tawaghat, and the wildflower carpets of Chiyalekh — form a complete visual itinerary that rewards every level of photographer.
Come prepared, acclimatize carefully, know your drone rules, and shoot in RAW. The mountain will do the rest.
With the Adi Kailash Yatra season approaching, it’s time to plan a journey that blends spirituality with raw Himalayan adventure. From sacred lakes to the divine presence of Adi Kailash, every moment feels profound and transformative. If you seek purpose beyond travel, this is your path.
Visit this page for Yatra Packages, Itinerary & Booking.