Hidden deep within the Kumaon Himalayas, the journey from Gunji to Jolingkong is one of India’s most spiritually charged and physically demanding high-altitude treks. Unlike the commercially crowded trails of Kedarkantha or Roopkund, this route rewards those who seek solitude, raw mountain beauty, and a profound connection with ancient pilgrimage culture. The landscapes shift dramatically — from dense river valleys to barren alpine meadows — and every step carries the weight of centuries of devotion.
What makes this trail stand apart is its dual identity: it is simultaneously a Hindu pilgrimage and a genuine Himalayan adventure. Trekkers walk the same paths as sadhus and devotees who have journeyed here for generations, all drawn toward the sacred Om Parvat and the divine Adi Kailash peak. The trail demands respect — both for the mountain and for your own body.
Before you lace up your boots, understanding the Adi Kailash Yatra Distance & Route in precise detail is not optional — it is essential. From altitude gain to daily mileage, from acclimatization windows to AMS warning signs, this guide gives you the operational intelligence you need to trek safely, smartly, and with full confidence.
How Long Is the Adi Kailash Trek? The Complete Distance Breakdown
The total Adi Kailash trek distance for the round trip from Gunji to Jolingkong and back is approximately 60 kilometers. This figure often surprises first-time trekkers who assume a pilgrimage trail will be gentle. It is not. Spread across 4 to 5 trekking days (excluding rest days), the route climbs from around 3,600 meters at Gunji to nearly 4,800 meters at the Jolingkong lake basin — a net altitude gain that demands serious preparation.
Here is the segmented distance overview for the full circuit:
- Gunji to Nabhidhang — approximately 12 km (Day 1)
- Nabhidhang to Jolingkong — approximately 10 km (Day 2)
- Jolingkong exploration & Om Parvat viewpoint — 4–6 km local (Day 3)
- Jolingkong to Nabhidhang — approximately 10 km (Day 4)
- Nabhidhang to Gunji — approximately 12 km (Day 5)
The additional kilometers on Day 3 come from exploring the Jolingkong lake basin, the Adi Kailash circumambulation path, and the viewpoints facing Om Parvat. If you include the drive sections and short walks around camp, the total journey easily touches 60 km.
Day-Wise Route Breakdown: Gunji to Jolingkong
The route from Gunji to Jolingkong is a high-altitude Himalayan stretch featuring gradual ascents, scenic valleys, and spiritual landmarks like Parvati Sarovar. This day involves controlled trekking, acclimatization, and offers breathtaking views of Adi Kailash and the surrounding peaks.
Day 1 — Gunji to Nabhidhang (12 km | ~5–6 hours)
Starting altitude: ~3,600 m Ending altitude: ~3,900 m Terrain: Moderate trail along the Kali River valley, gradually ascending
Gunji is the last proper village before the restricted zone begins, and it is where most trekkers finalize permits and spend the night before pushing forward. The trail on Day 1 follows the western bank of the Kali River, which forms the natural border between India and Nepal. You will pass through small pastoral settlements, rhododendron forests, and open stretches with views of snow-capped peaks.
The climb is steady but not punishing. The key challenge on Day 1 is psychological — the distance feels longer because of the altitude and the weight of a full pack. Nabhidhang is a meadow settlement with basic dhaba facilities and camping options. Arrive early, hydrate aggressively, and avoid heavy physical exertion in the evening.
Pro tip: The trail between Gunji and Nabhidhang has multiple stream crossings that can be slippery after rainfall. Trekking poles are highly recommended.
Day 2 — Nabhidhang to Jolingkong (10 km | ~5–7 hours)
Starting altitude: ~3,900 m Ending altitude: ~4,700–4,800 m Terrain: Steep ascent, scree sections, high-altitude meadows
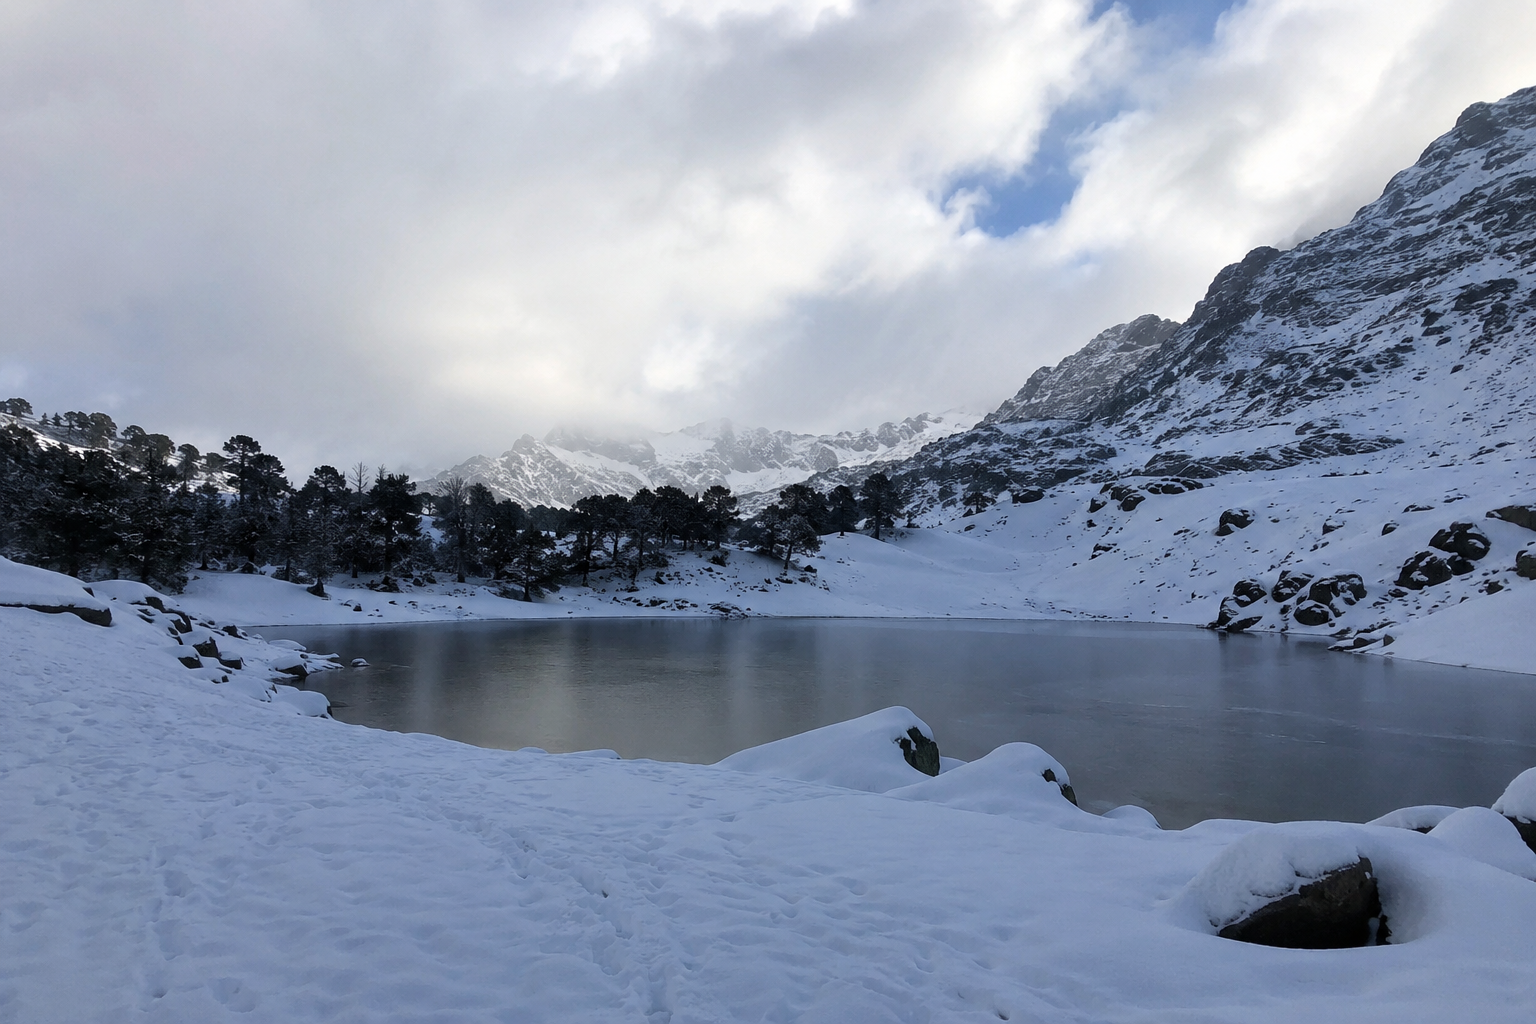
This is the most demanding day of the trek and the one where altitude sickness risk spikes most sharply. The trail climbs nearly 900 meters in a relatively short horizontal distance, which means the ascent gradient is genuinely steep in several sections. As you gain altitude, the vegetation thins and the landscape becomes increasingly austere — grey boulders, patches of snow, and a sky that feels impossibly blue.
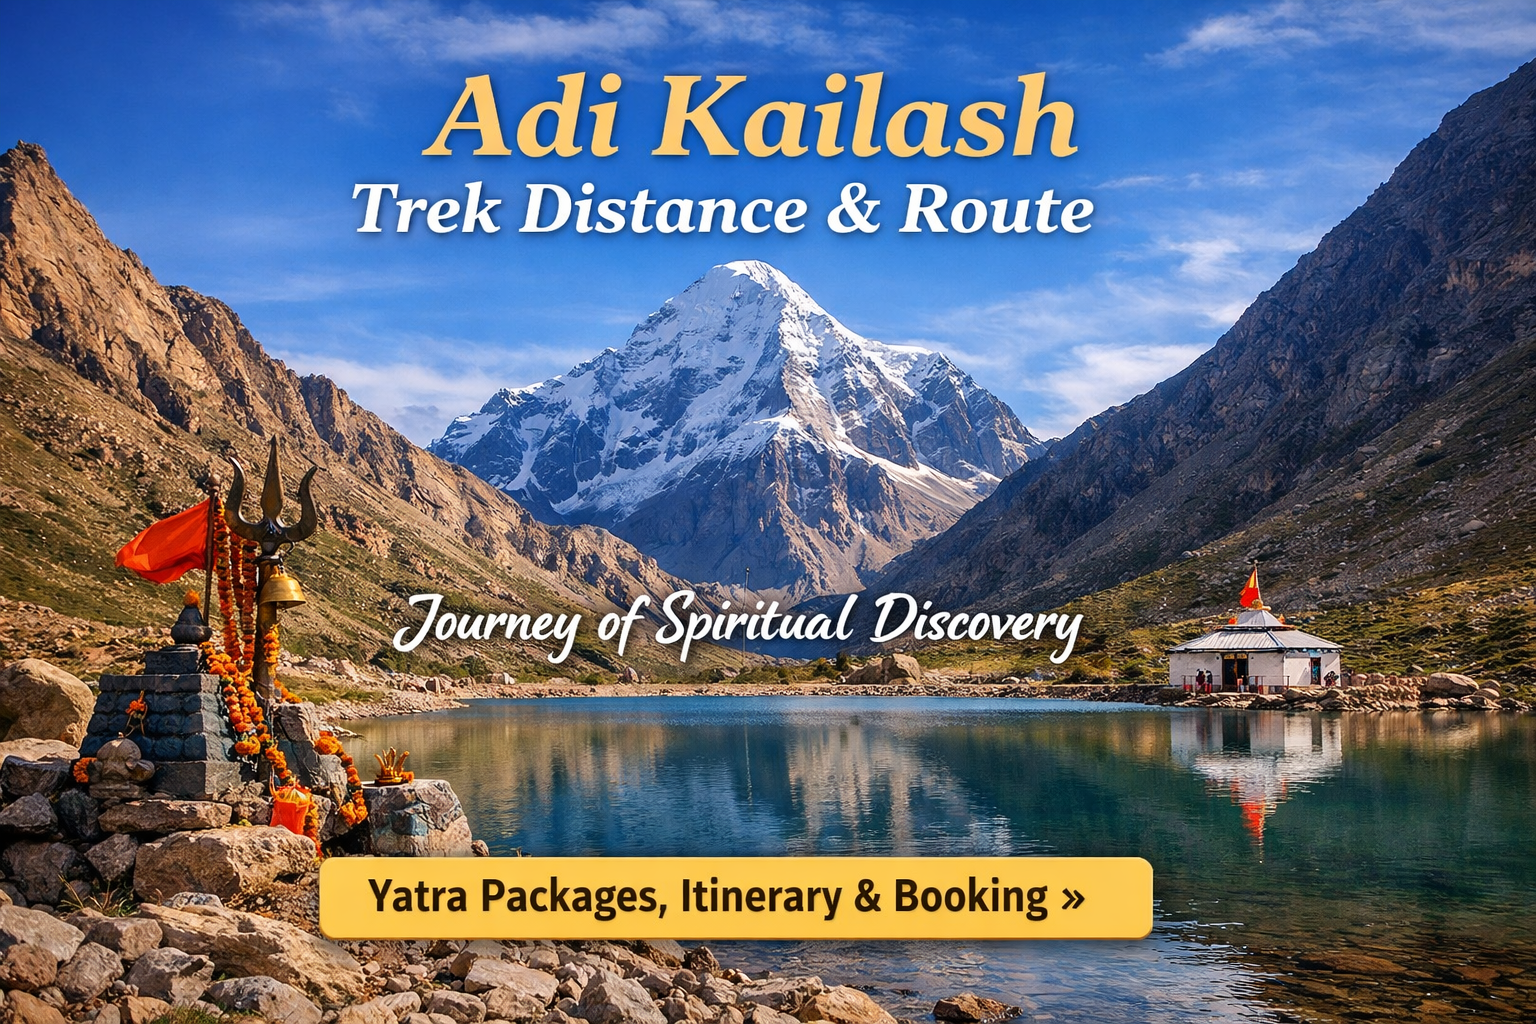
The final approach to Jolingkong opens into a wide, otherworldly basin with the sacred lake at its heart. The Adi Kailash peak (6,191 m) dominates the skyline ahead of you, and on clear days, the snow face reflects in the lake’s surface in a sight that many trekkers describe as life-altering.
Critical advice: Start Day 2 no later than 6:00 AM. Afternoon weather at this altitude is unpredictable, and you want to be settled at camp before any potential thunderstorms roll in.
Day 3 — Jolingkong Exploration & Om Parvat Viewpoint (4–6 km local walking)
Altitude: ~4,700–4,800 m Terrain: Gentle basin walks, optional steep viewpoint climbs
Day 3 is the spiritual and visual climax of the entire journey. The morning hours offer the clearest views of Om Parvat — the mountain whose snowfields naturally form the sacred Hindu symbol Om — and most trekkers are up before dawn to witness the first light paint the peak in gold.
The Jolingkong basin itself rewards slow exploration. The sacred lake, the small temple dedicated to Shiva, and the Adi Kailash peak circumambulation path (a shorter version of the Kailash parikrama) together occupy most of the day. This is also a critical rest day that supports acclimatization before the descent.
Important: Do not attempt any high-altitude scrambles above the basin without a guide. The terrain above 5,000 m here is unstable and potentially dangerous.
Day 4 — Jolingkong to Nabhidhang (10 km | ~4–5 hours)
Starting altitude: ~4,800 m Ending altitude: ~3,900 m
Descent days are deceptive. The drop in altitude brings relief, but the knee stress on steep downhill sections is significant. Take your time, use your poles, and do not rush — twisted ankles are among the most common injuries on descent. The trail back to Nabhidhang is the same route you ascended, but viewed from the opposite direction, it often feels like a completely different landscape.
Day 5 — Nabhidhang to Gunji (12 km | ~4–5 hours)
Starting altitude: ~3,900 m Ending altitude: ~3,600 m
The final trekking day brings you back through the river valley to Gunji. By this point, your legs are experienced, your lungs are adapted, and the scenery you rushed past on Day 1 now reveals details you missed. Many trekkers report that the return walk to Gunji is their favorite portion of the trek — unhurried, reflective, and deeply satisfying.
Difficulty Level: What You’re Really Getting Into
The Adi Kailash Yatra is classified as a moderate-to-difficult trek. Here is what that actually means in practical terms:
- Fitness requirement: You should be able to hike 10–12 km with a loaded pack for 5–6 hours consecutively before attempting this trek
- Altitude challenge: Nearly the entire trail sits above 3,500 m, and the high camp at Jolingkong is above 4,700 m — well within serious AMS territory
- Trail conditions: The route includes loose scree, river crossings, and sections with no formal path marking
- Weather volatility: Conditions can change within hours; snowfall is possible even in summer months at upper elevations
This trek is not recommended for individuals with no prior high-altitude experience, those with cardiovascular conditions, or anyone who has not undergone basic fitness preparation for at least 4–6 weeks beforehand.
Acute Mountain Sickness (AMS): Prevention and Early Recognition
AMS is the single greatest threat on the Adi Kailash trek route, and it deserves serious attention. The rapid altitude gain between Nabhidhang and Jolingkong is the primary danger window.
Early Symptoms to Watch For
- Persistent headache not relieved by hydration or rest
- Nausea or loss of appetite
- Dizziness or light-headedness
- Disturbed sleep with periodic breathing interruptions
- Unusual fatigue disproportionate to exertion level
AMS Prevention Protocol
Hydrate relentlessly. At altitude, your kidneys excrete more water, and your respiratory rate increases, meaning you lose fluid faster than at sea level. Aim for 4–5 liters of water daily on trekking days.
Ascend gradually. The rule “climb high, sleep low” exists for a reason. On Day 2, if your guide suggests a short acclimatization walk above Nabhidhang before the full push to Jolingkong, take it.
Avoid alcohol and sleeping pills. Both suppress respiratory drive, which is already under stress at altitude.
Carry Diamox (Acetazolamide) if prescribed. Consult your doctor before the trek about prophylactic use. It is not a substitute for acclimatization but can reduce symptom severity.
Never ascend with symptoms. This is the non-negotiable rule. If a member of your group shows AMS symptoms, descend immediately — not tomorrow morning, not after one more rest hour. Descent is always the correct treatment.
Acclimatization Strategy for the Jolingkong Route
Most trekkers who suffer from AMS on this route made the same mistake: they rushed. A well-structured acclimatization plan adds only one day to your itinerary but dramatically reduces risk.
Recommended acclimatization approach:
- Spend two nights at Gunji before beginning the trek if arriving from low altitude
- On Day 2, consider trekking to halfway between Nabhidhang and Jolingkong, resting for 2 hours, then descending back to Nabhidhang to sleep — push to Jolingkong the following morning
- At Jolingkong, limit physical exertion on arrival day to short walks only
- Eat warm, carbohydrate-rich meals even when appetite is reduced — your body needs fuel at altitude
If you are planning your Adi Kailash Yatra registration 2026 in advance, build extra acclimatization days into your schedule. The permit system allows for flexibility, and being conservative with your timeline is never a mistake in high-altitude environments.
Essential Gear Considerations for the Route
While a detailed breakdown is available in the Adi Kailash yatra packing list on Mountainiax, the trail-specific gear priorities for this route include:
- Layering system: Temperatures at Jolingkong drop below freezing even in peak season nights
- Waterproof trekking boots with ankle support — mandatory for the scree sections on Day 2
- Trekking poles: Non-negotiable for both ascent and descent
- Sleeping bag rated to -10°C minimum
- Sun protection: UV intensity at 4,500+ meters is severe; SPF 50+ sunscreen, UV-blocking sunglasses, and a hat are essential
Best Time to Trek: Windows and Weather Reality
The trail is open within a defined seasonal window governed by both weather and permit regulations. For anyone researching Adi Kailash Yatra Opening & Closing Dates 2026, the standard operational window runs from mid-May through mid-October, with June and September being the optimal months.
- May–June: Clear skies, snow still present on upper sections, cooler temperatures — excellent for photography and AMS management
- July–August: Monsoon season brings increased rainfall, trail instability, and cloud cover obscuring views — trekkers should exercise caution
- September–October: Post-monsoon clarity offers some of the finest visibility of the season, though early October brings rapidly dropping temperatures
Avoid planning your trek in July if Om Parvat viewpoints are a priority — monsoon cloud cover frequently obscures the peak for days at a stretch.
Getting There: The Gunji Trailhead
For trekkers traveling from the plains, the journey begins long before Gunji. The full logistics of reaching the trailhead are covered in our detailed Adi Kailash from Delhi guide on Mountainiax, but in brief: the route runs from Delhi to Kathgodam by rail, then by road through Almora, Pithoragarh, Dharchula, and finally to Gunji — a journey of approximately 600 km that takes 2–3 days by surface transport.
Gunji is accessible only by road and requires an Inner Line Permit (ILP) for the restricted zone. Permits must be arranged in advance, and the process is now streamlined through official government portals. Do not arrive at the checkpoint without documentation — you will not be allowed through.
Frequently Asked Questions
1. What is the total distance of the Adi Kailash trek from Gunji to Jolingkong?
The round-trip distance is approximately 60 kilometers, covering the Gunji–Nabhidhang–Jolingkong route and returning the same way.
2. How many days does the Adi Kailash trek take?
The core trekking circuit takes 5 days. Including travel days to and from Gunji, most trekkers plan a 10–14-day overall journey.
3. Is the Adi Kailash trek suitable for beginners?
It is not recommended for complete beginners. Prior experience on treks above 3,000 meters and good cardiovascular fitness are prerequisites.
4. What is the highest point on the Adi Kailash trek?
The Jolingkong basin sits at approximately 4,700–4,800 meters above sea level and is the highest camping point on the standard route.
5. Can I get AMS on this trek?
Yes. The rapid ascent on Day 2 from Nabhidhang to Jolingkong is the highest-risk section. Proper acclimatization, hydration, and awareness of early symptoms are essential.
Summary
The Adi Kailash Yatra Distance & Route from Gunji to Jolingkong covers approximately 60 kilometers round trip across 5 trekking days, ascending from 3,600 meters to nearly 4,800 meters at the Jolingkong basin. It is a moderate-to-difficult trail that demands physical preparation, respect for altitude, and a genuine commitment to AMS safety protocols.
The rewards are proportionate to the challenge: sacred landscapes, raw Himalayan wilderness, the extraordinary vision of Om Parvat, and a sense of accomplishment that stays with you long after you return to the valley.
Plan conservatively. Acclimatize seriously. Move with intention.
With the Adi Kailash Yatra season approaching, it’s time to plan a journey that blends spirituality with raw Himalayan adventure. From sacred lakes to the divine presence of Adi Kailash, every moment feels profound and transformative. If you seek purpose beyond travel, this is your path.
Visit this page for Yatra Packages, Itinerary & Booking.